How To Make A Carrd
So...You want to make a Carrd. Well, look no further! This carrd will detail exactly what you need to have you be an expert at making your own carrds in no time. Please choose what you'd like to learn more about. If you are a complete newbie and have no clue where to start, don't fret! just start at the beginning and work your way down!
Please note: This Carrd intends to direct you how to make a Carrd on a PC. If you are using a mobile device, your milage may vary.
Intro
The first and most important part of making a Carrd, is making an account and choosing a template. You can do that here.
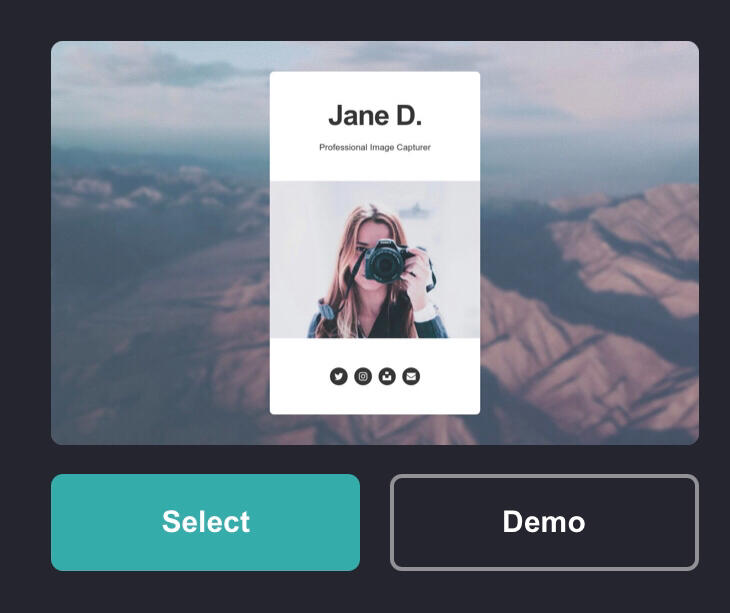
Pick whatever template works best for what you are going for, but it doesn't matter too much. Most of everything is able to be customized. This Carrd was made with this template:
There are a few things that are important to keep in mind when making Carrds.
You have a limited amount of elements you can add for free. This is capped at 100 elements. Though if you pay, you have unlimited.
You have a limit to how many Carrds you can make under one account for free. This limit is 3.
Once you have your template picked out, you can start adding elements to it.
An element is, essentially, any one item on the Carrd. This text box, is an element. The list above this text, is a separate element and the photo above that is its own as well. You can see how these elements can add up quite quickly. Make sure to plan your Carrd ahead of time and be sure you'll be under the element limit. If you are running low on elements, don't worry! There's a few tips we'll teach you further along to help you stay under the limit.
To add elements, click the + symbol on the far left of the bar in the upper right hand corner of your screen.

From there, it will bring up this list of all the elements available to you.
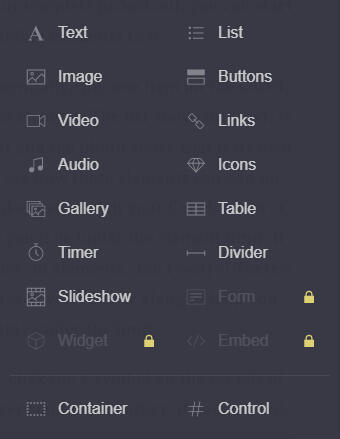
We will go through and cover each of them and we'll cover the rest of the buttons on the bar later down the road.
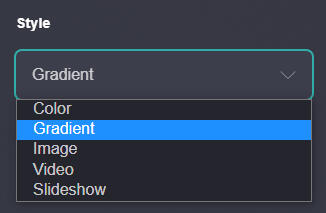
You can also click the background of your Carrd and edit if it's a colour, gradient, image, video, or slideshow.
For now, set it to a nice colour you enjoy or a photo, and next we'll go over how you can add text to your Carrd.
Text
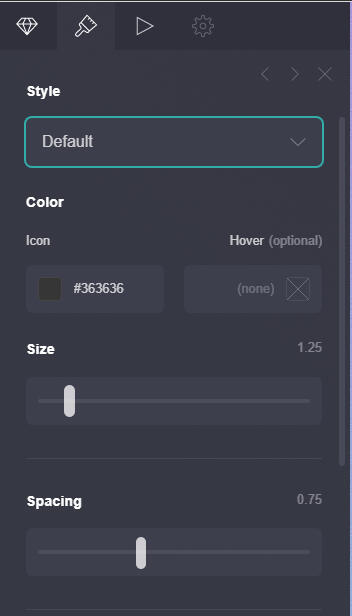
Text is one of the most important elements on Carrds. Making sure your text is well designed can make or break your site. When you first click the "text" button, it will create a text box which you can move wherever you wish the text to be, and a bar will appear on the left of your screen where you can input your text. There will also be icons above the text box. Enter your text, then click the paintbrush so we can edit how our text looks.

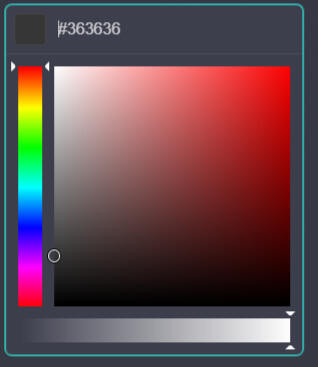
Here, you will gain access to a bunch of tools to edit how your text looks and interacts with your site. We'll go through them in batches. First and foremost, you have the ability to change the colour of your text. Clicking it will allow you to change the colour, and opacity of your text.

Under that, you have the ability to change the colour of embedded links (if you have any), font, size, and weight of your text.
Fonts can be difficult, because there is a very large selections of fonts to choose from. If you are having trouble choosing what font is best for you, there is a wonderful Carrd here that lists and displays all the available fonts.
The size is quite obvious, it controls the size of the text on your Carrd.
Weight, on the other hand, decides how bold your text is.
Here's some text with high weight
And here's text with low weight
Next, You can control Line spacing, Letter spacing, Margins, and how the text appears.
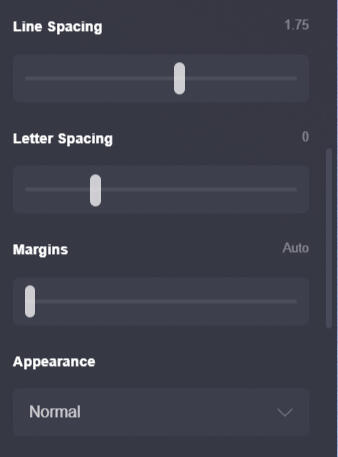
Line spacing controls how much space is between each line of text. The higher the number the more spaced out the individual paragraph breaks will be. For example:
High line spacing:
Lorem ipsum dolor sit amet, consectetur adipiscing elit. Etiam nec arcu lorem. Vestibulum porta, eros sit amet accumsan porttitor, eros lacus semper diam, in ullamcorper tortor purus eu lorem.
vs
Low line spacing:
Lorem ipsum dolor sit amet, consectetur adipiscing elit. Etiam nec arcu lorem. Vestibulum porta, eros sit amet accumsan porttitor, eros lacus semper diam, in ullamcorper tortor purus eu lorem. Curabitur auctor sit amet neque et venenatis. Suspendisse cursus suscipit urna sit amet eleifend. Cras gravida ipsum vel scelerisque luctus.Donec malesuada aliquet mauris, et blandit velit convallis ac.
Letter spacing is similar, but is the space between the individual letters.
High letter spacing
vs
low letter spacing
Margins control how much space is between the text box, and the other elements around it. It's recommended to leave this on 'auto' if you aren't quite sure how you want to use it. Margins also means the same thing on any element, so it will not be covered again.
The "Appearance" tab allows you to change how the text looks. You can make it normal, all lowercase, all uppercase, or "small caps"
Small caps example
After that, you can edit the alignment. This moves the text in whatever direction is chosen. You may leave this on "auto", but it's good to explore what different text alignments look like. Centered is a very common text alignment.
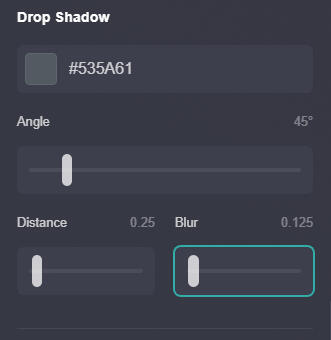
You can also choose to have a dropdown shadow on your text, and select the colour for that.
example of text with shadow
These are the most important aspects of using text on Carrd. The other tabs are far more advanced, and not likely to be used by beginners. Next, we're going to cover lists.
Lists
Lists can be incredibly useful in your carrds! To put it simply, a list is a bulletpointed list with text. The text used in your list, will often be the same text you use elsewhere in your Carrd.
Here's an example of a list
every time you press enter it will create a new line and a new bulletpoint. If you do not press enter and just keep typing, it will instead just wrap the text as you can see here.
Now, like with text, there will be a paintbrush where you can edit aspects of your list. When you press it, you'll have the ability to edit the list itself, then the bullets and the text separately.
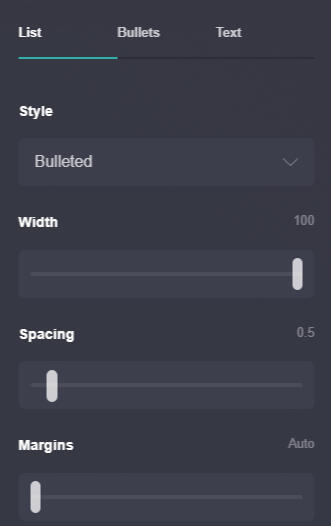
Style refers to if you want the list to be bulleted, or numbered.
•Bulleted text is like this
1.Numbered text is like this
Width refers to how wide the element itself is.
A list
with
full width
vs
a list with
low width.
spacing refers to how much space is between the individual items on the list.
high spacing list:
First item
Second item
Third item
vs a list with low spacing:
First item
Second item
Third item
Once you figure out how you want your list to look, you can move onto editing the bullets and or numbers. First, we will cover Bullets.
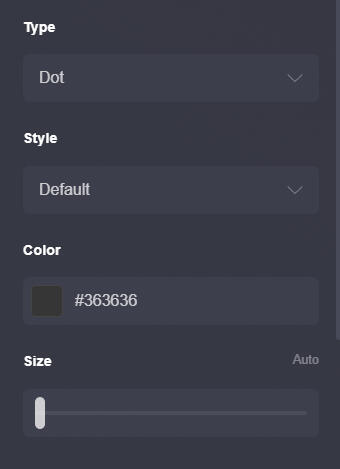
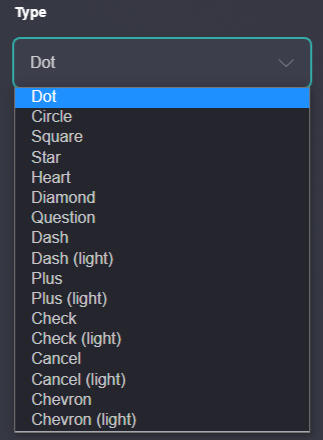
First you will be able to change what shape the actual bullet is. Carrd has a lot of shapes available, and I recommend going through each one and finding which suits your needs best.
After that, you can choose if you want the default bullets, one's that're two solid colours, or ones that are just an outline.
A list with default bullets
A list with coloured bullets
A list with outlined bullets
You can also choose how big or small your bullets are
Big bullets
Small bullets
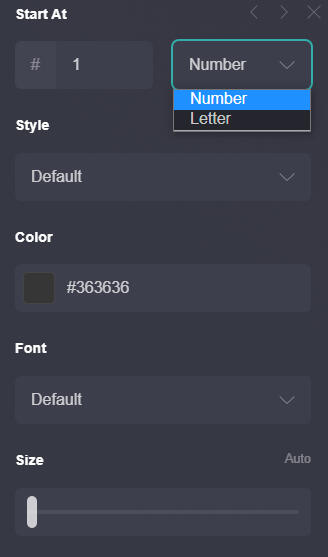
Numbered lists are very similar, except you can control if it's numbers or letters!
The text section allows you to edit the text for your lists, which is set up the exact same way as editing a text box!
Now you know how to make lists. Next up, is photos!
Images
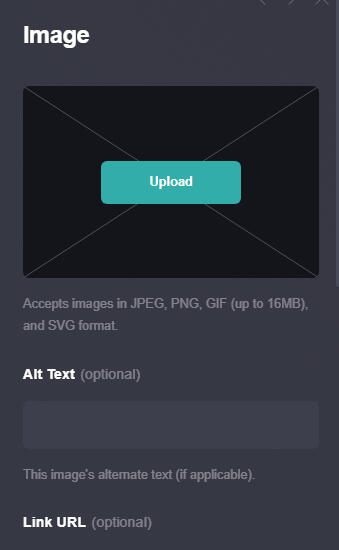
Images are another major aspect of making a good Carrd. Most people include some sort of imagry one way or another in their carrd. When you add an photo, the first thing you'll be prompted to do is upload an image.
Once you do upload your img, you'll be prompted to adjust / crop it how you like it. Once done, your image will be inserted. As with the other elements, there will also be a paintbrush option to edit the size and other info.
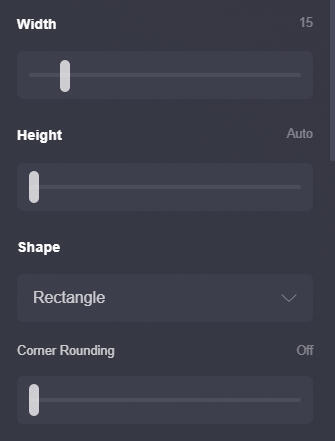
Width and height, as expected, control how tall and wide the image is. It also has a few other options such as "auto" "max", "edge to edge" and "full bleed".
"Auto" means the site will proportion the img how it believes it'll fit best.
"Max" just means the maximum size the img can be without impeading on the margins.
"Edge to edge" means the img will go to the edge of whatever container it is inside (more on containers later).
This is an "Auto" Img

This is a "max" img

This is an "Edge to edge" img

and this is a "full bleed" img

Each img type has it's own purpose and style. Play around with the sizes to see what works best for what you're making!
You can also control the shape, and have circular images instead!

As well as controlling how rounded the corners are of your rectangle images for a more rounded square effect!

You can also add a border (which can be solid, or dotted) and dropshadow to your img!

Now, if you just want to input one or two images here and there, it is totally acceptable to just insert the photos. But if you are going to be posting a large amount of images, and want them to be able to be clicked through, it'd be better to put in a gallery.
A gallery is a collection of images that the page viewer can click through. Good for commission or product examples.
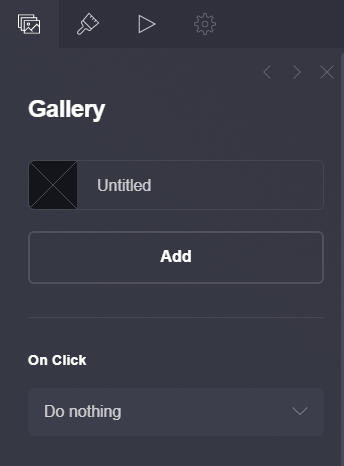
when you make a gallery, it'll prompt you with the ability to add multiple images. You can add new images via clicking the "add" button. You will also have the option to edit how the gallery itself looks. The "On click" button allows you to make it so people can view the full sized image when clicked.

a "Default" gallery will size each image separately to what fits best.
a "Fit" gallery will make each image the same size that is as wide as possible
a "Fixed" gallery will make each image the same size, but as smaller squares.
and a "full" gallery will display each image more accurately to each of their individual sizes without tweaking.
A default gallery:


You can also edit how the images appear, which is the same as editing other images on the site. With this you can make full galleries, and the occasional decorative image.
Next, onto the control function
Control
The control function is one of the most vital aspects to making a good Carrd that many people find confusing. So far, everything you've made so far has been on one page of your Carrd. But what if you want more than one page? well! that's where the control function comes in.
it, in essence, adds another page to your Carrd which you can then direct people to via a button, icon, or link.
You can find the control button at the very bottom of the available elements.
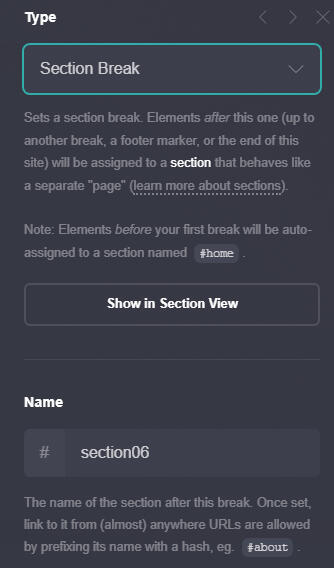
"Type" refers to what the control function does. Thankfully Carrd itself explains these in depth. "Section break" is the only type we are going to cover here, as it's the most common use of the control function.
Once you insert a control, name it something related to what will be in that section. For example, this section will be labeled 'control'. What you name this will also be what the resulting link is. Example: https://howtomakea.carrd.co/control
You can then reference and link to this page wherever available by simply inputting #page. This also works for link embeds. For example, text(#test) would take you to the page labeled "#test".
Now, we're going to put this control function to the test with some buttons and icons
Buttons
Buttons are an important part of any good Carrd. Buttons help your sites viewers to navigate between pages on the Carrd itself, as well as direct them to any external sites.
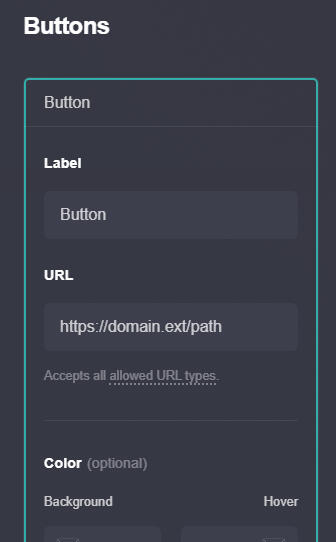
The first thing you should do when setting your button, is editing the label (What the button says), and adding the URL.
Remember! you can link this button to another page on your Carrd by simply putting #page.
Ex:#intro
You can also edit the colour of the button, and if it changes colour when hovered over. If you click on the paintbrush, you'll be able to edit how the button looks.
You can choose if it's a solid colour or if it's just an outline, and if it has just text or also has an icon.
You can also choose the colour of the text on it, and edit the text as any other text on Carrd. You can also decide how rounded you want the edges to be, and if you want the buttons to be in a row, or a column.
Row'd buttons will go from left to right, while columned will go from top to bottom.
Row of buttons:
Column of buttons:
Sometimes though, you want something a little fancier than just buttons. Well, that's where icons come in.
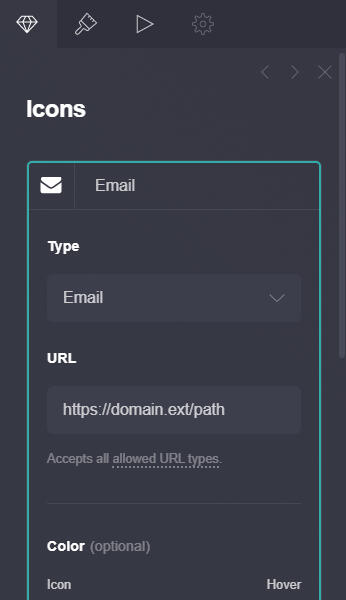
Icons are little buttons that are symbols, rather than text. Carrd has an extremely large amount of social media and websites logos available in icon form.
Thankfully, icons are set up almost exactly the same as buttons! You can edit the picture it shows, input a URL, and edit the colour of it!
You can also choose if you want it to be solid, an outline, or the default!
Default icon:
Solid icon:
Outlined icon:
After that, you can edit how big the icon is and how it is spaced. "Spacing" with icons, refers to how much space is between it and any other elements above and below it.
Now that we've got those out of the way, let's move onto Links, Tables, and Dividers.
Links, Tables & Dividers
So, Links, Tables, and Dividers are all very quite simple. Which is why we've decided to merge them into one section. They aren't used as often as other elements, since they are more decoration and organization than absolutely necessary componants. That being said, they are incredibly useful all the same!
A link is, exactly as it says. When you press the link button, it will insert a piece of text with a link attached. You can then edit this text like any other text as well as control what colour it is as well as if it changes colour when hovered over.
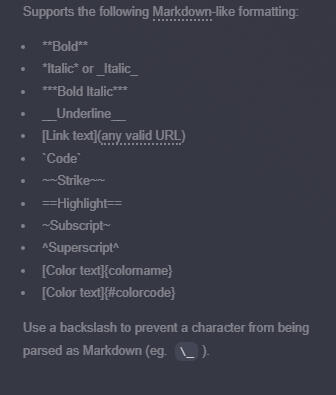
This does take up another element though, so it's recommended if your link is to be with other text that rather than using a link element you simply embed the link in a normal text box. This can be done by surrounding text with [brackets] and then putting the link in (round brackets).
Ex: [Text](link )
Carrd is helpful in providing this information, along with other formatting tips right on the site when editing any text box.
As for a table, it simply inserts a table in which you can list things. It autofill some information you can look at to help you understand how the table works.
| Title | Author | Year | ISBN |
|---|---|---|---|
| Neuromancer | William Gibson | 1984 | 0-441-56956-0 |
| Snow Crash | Neal Stephenson | 1992 | 0-553-08853-X |
| Software | Rudy Rucker | 1982 | 0-441-77408-3 |
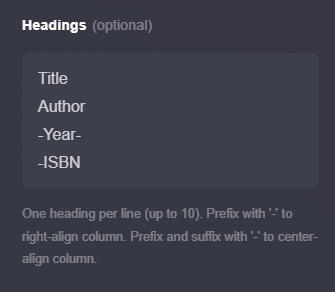
The headings are the text that goes across the top of the table. You can add a new heading by pressing enter to create a new line. Rows work the same way, and fill in the other direction of the table.
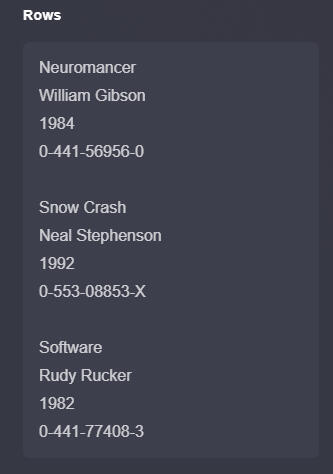
With this you can easily create price sheets for commissions or selling products, keep track of people, or just list information about yourself.
If you click the paintbrush, you can also edit how the table looks. You can choose between "Minimal" or "Grid". As well as change how wide it is, the colour, and how much space is between it and other elements.
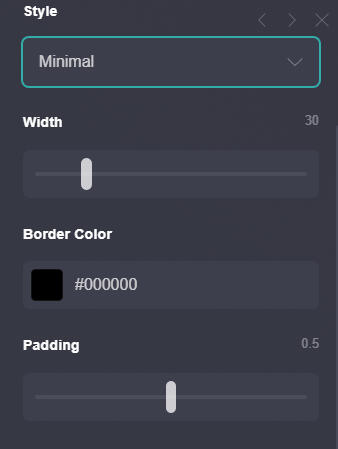
Grid table:
| Title | Author | Year | ISBN |
|---|---|---|---|
| Neuromancer | William Gibson | 1984 | 0-441-56956-0 |
| Snow Crash | Neal Stephenson | 1992 | 0-553-08853-X |
| Software | Rudy Rucker | 1982 | 0-441-77408-3 |
And finally, Dividers. They are simply a nice decorative line to help you divide things on your Carrd.
The first thing you can edit is if it's a single line, a double line, a dashed line, or a dotted line.
single line:
Double line:
Dashed line:
Dotted line:
You can also choose if you want it to be a vertical line, or a horizontal line.
Vertical
Horizontal
as well as its colour, height, thickness, margins and alignment.
Using dividers is a great way to make your Carrd look more organized, and help you section out different parts.
Next up, is audio and videos.
Audio + Video
Audio and video are not used as often in mainstream Carrds, but they are an option if it's something you'd like to explore!
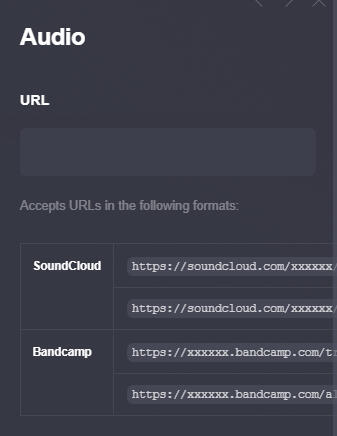
When inputting audio, it only allows you to enter a URL. Carrd only accepts soundcloud and bandcamp links for audio files. Once you input a link, you will be able to edit how it appears.
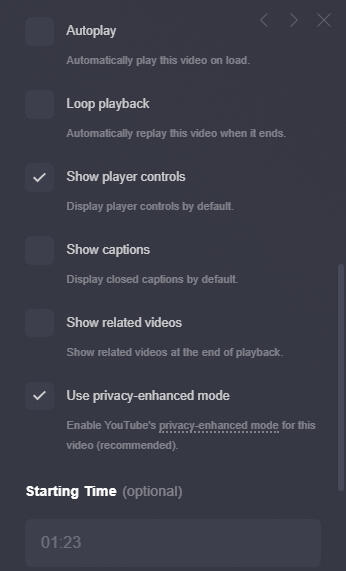
Videos, on the other hand, allow you to either directly upload a video to display or embed a video. When embedding a video, you can input any video link from Youtube, Twitch, or Vimeo. If uploading a video, you can also control if it auto plays, loops, is muted, and if people can control the video.
You can also control the size of the video.
Embedded video
There is tons of reasons people may want audio or videos to be displayed on their Carrd, and it can be a great way to show off some of your content!
Next, we're going to cover timers and slideshows.
Timers & Slideshows
Admittedly, I have never seen somebody with a timer or a slideshow on their Carrd before. But the option is there, so we may as well explore them!
when you first input a timer, the first thing you can do is set what kind of timer it is.
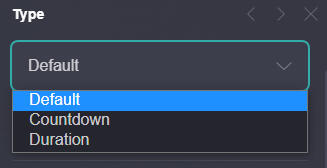
A default counter allows you to set a date that the counter slowly counts down to or up from.
You can also edit how many digits is shown, and each aspect of the counter including the actual digits and the text below it.
A countdown timer, only counts down to the date that's put in, and will stop at 0.
A "duration" timer counts down from a duration, stopping at 0. You can also set it to redirect the page to a URL when the timer has reached 0.
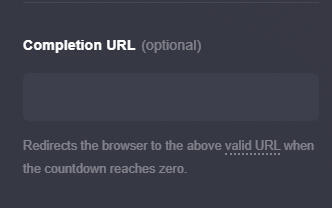
This can be incredibly useful if you have any big exciting drops you want people to check in for, and then be redirected to your shop when they go live. Or be a little trick that sends you to a rickroll. The choice is yours!
Now, for slideshows. Slideshows allow you to upload multiple photos, which Carrd will then organize into a coherent slideshow to view. It also allows you to set the type of transitions, round the corners, control how long each image is shown, and change the size of the slideshow. This could be useful for showing off product examples or any other important photos.
Next, we're going to learn about containers.
Containers
Containers are one of the most simple, but most useful things you can have on your Carrd. Containers, simply put, hold other elements.
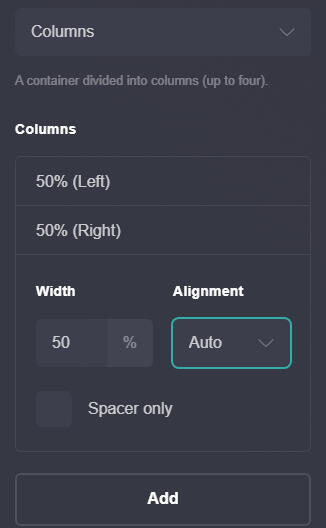
There are two options for containers. "Default" and "Column".
Default, creates a box in which you can put things. You can also control its size and colour and how things are aligned in it.
Here is some text inside of a container
A column container allows you to have sections to put elements in, side by side.
Here is text on one side of the column container, and a picture of a puppy on the other side.

You can also put other things underneath!
with understanding column containers, you can make some very interesting and fun Carrd layouts to display information of yourself alongside relevant images!
Next we're going to go over styles, and how they can make your life easier when making your Carrd look good.
Styles
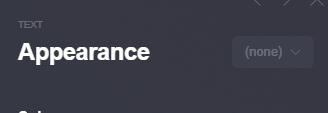
Styles are something that will make quickly editing your Carrd far easier. You may have noticed on almost every element that you can edit, there was this little box in the upper righthand corner. Clicking this, will bring you to the styles.
There will be a button that says "Add Style". When that is pressed, Carrd will save the settings for whatever element you've edited. You can then rename it, and quickly change an element to look like that via going into the style and changing it.
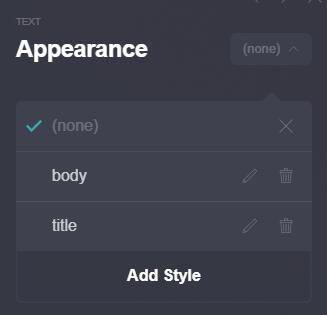
The "style" function, is how we've been able to get the big title on every page. We simply insert a text box and set it to the "title" style which makes the text a large title. When we wish to go back to normal text, we change it to "body".
This can be incredibly useful if you want to change up how text looks a lot on your Carrd and don't want to have to fiddle with the settings each individiual time.
This function works on every single element. You can save the settings of every element to use again, and you can have a very large number of styles.
on the next page, there will be more tips and tricks, and some final information regarding what Carrd has to offer.
Tips and tricks
There's still a lot Carrd has to offer, so let's go through some tips and tricks to get your Carrd looking the best it can as fast as possible. Remember that bar in the upper righthand corner of your screen?

if you click the # symbol, you can jump to one of your pages. This makes editing things incredibly easy, so you don't have to scroll all the way.
You can also click the phone to view how your Carrd will look when viewed from a mobile device.
If you're running out of elements, there's a few things you can do to try and get more bang for your buck.
instead of using a list element, you can use Alt+7 to insert a bulletpoint. Or simply copy and paste:
•
You can then make a list in the middle of a textbox,
• Like
•So
This also gives you more control over your list, as you can use emojis as bulletpoints instead of normal black circles, and some people may prefer their list be centered the same way the text is.
You can also, rather than use a divider, just put to dashes, or underscores. Like so:
_____
--------------
Or you can copy and paste in a divider that suits your aesthetic from here
:・゚✧:・゚✧
You can also edit the colour of specific words using the formatting Carrd allows.
[text]{#colourcode}
Like so
If you need to find the hex for a colour, you can use this website to find the hex code.
This allows for a large variety of creativity in making your Carrd with limited space!
Support this Carrds creator
Hello there! My name is Kevin and I am a part of the heretic system.
I hope you enjoyed this Carrd and found it helpful.

If you would like to throw me a tip, support me, or learn more about me, feel free to check out the following:
I've also made quite a few other informative Carrds, which you can view here:
Thanks for reading!